YeS RiP: blogger

Showing posts with label blogger. Show all posts

gravatar

Blogger About Pages

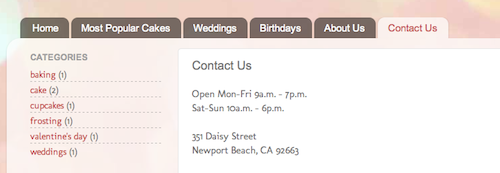
Blogger Pages lets you publish static information on stand-alone pages linked from your blog. For example, you can use Pages to create an About This Blog page that discusses the evolution of your blog, or a Contact Me page that provides directions, a phone number, and a map to your location.
blog pages 
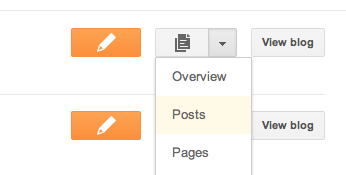
To create a page, click on the drop-down menu next to the gray Post List icon, and scroll down to Pages. You can create up to 20 pages.Edit Page
<p>Once your page is published, you can link to it from the new <strong>Pages gadget</strong>. This gadget lets you add links to your pages as tabs at the top of your blog, or as links in your blog's sidebar. Existing third party templates may not support pages as tabs, but pages can still be added as links in your blog's sidebar. Here's an example of pages as links on a sidebar:</p>
<img class=
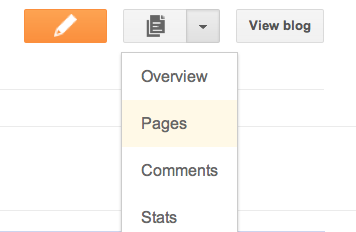
In the Pages gadget, you can decide which pages will have links, and in what order they will appear. You can also choose whether or not you want links automatically created for pages when you create them by checking or unchecking the box to the left of Add New Pages by Default.

gravatar

Blogger Using our upgraded interface

Along with several other Google products, Blogger’s taken on a whole new look: A clean, sleek interface designed for a streamlined blogging experience. Not only does the new interface load faster, but we’ve also added shortcuts to your most important blogging actions. Check out our quick list of what’s changed below.

Dashboard

Dashboard
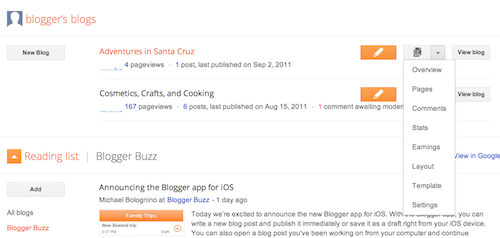
Your Dashboard, as always, is your starting point. This is where all your blogs are listed, and you can click on the icons next to them to perform various actions on each blog, such as:

gravatar

Blogger Schedule posts

If you'd like your post to automatically publish at a specific date and time, you can schedule your posts on the Post Editor. Under "Post Settings" on the right-hand side, just click on Schedule.
The Schedule option under Post Settings 
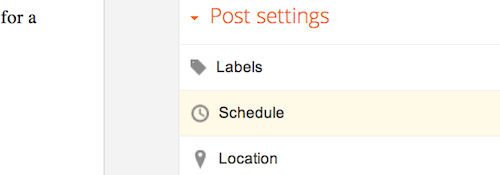
If you select Set date and time, you can choose a date and time on a calendar for your post to be automatically published.

gravatar

Blogger Find an old post

All your posts are available for editing on the Posts tab, which you can access from the drop-down menu on your Dashboard.
Edit posts>. 
<p>You can use the search box at the top right to filter the list for posts containing particular words. Next to the search box is a drop-down menu for labels, so you can click on a label in the menu and you'll see only posts with that label. You can also change the number of posts displayed, or use the arrows to scroll back in time through the chronological list.</p> 
<img src=

gravatar

Edit posts

You can edit your posts by clicking on "Posts" from the drop-down menu on your Dashboard. Edit a Post

gravatar

Create 'After the jump' summaries

After the Jump is a feature which lets you create expandable post summaries in your blog posts, so longer posts appear as an intro with a link to Read More.
Creating jump breaks in your blog posts can be easily done right from the Post Editor, without the need for any HTML changes. First, decide where in the post you want to create the jump break, and place your cursor in that position:

The text where you want to jump
Once your mouse cursor is placed at the jump point, simply click the Insert Jump Break toolbar icon:

Jump icon in the toolbar

gravatar

TagCrowd

Just as an exercise in seeing the evolution of the United States presidency, word-wise, here are two word clouds I created of the ‘State of the Union Address.’
One is by U.S. President Bush on January 29, 2002. The other is President Obama on January 25, 2011. Click on the thumbnail to see the full cloud.
State of the Union Address word cloud, Bush 2002 vs. Obama 2011


gravatar

Check Twitter Within Gmail Or From iGoogle Homepage

Ever wanted to check your Twitter account while checking your email within Gmail or from your iGoogle homepage? Now you can do that with TwitterGadget, an auto-refreshing Twitter client.
TwitterGadget is a clean, robust, web 2.0 style client for Twitter.com, designed to submit and view status updates via your iGoogle homepage, Gmail account, within Google Wave, or directly in your browser.
How to install TwitterGadget within Gmail:
1. Login to your Gmail account.
2. Click Settings (upper-right corner). On the Settings page, click the Labs tab.

Gmail Settings Page
3. Enable Add any gadget by URL and click Save Changes.
4. Click the Gadgets tab. Enter the URL for TwitterGadget and click Add.
TwitterGadget URL: http://www.twittergadget.com/gadget_gmail.xml
Enter TwitterGadget URL
5. You’re done! Enjoy using TwitterGadget straight from your Gmail.
Enjoy Using TwitterGadget Within Gmail
How to add TwitterGadget to your iGoogle homepage:
Just go to:
and click Add to iGoogle. That’s it!
There are more ways to use TwitterGadget like the Chrome app, Firefox sidebar, bookmark applet, Google Wave, and more!

* If you want to use TwitterGadget as a bookmarklet, just drag this link (Drag Me – TwitterGadget) to your Bookmarks Toolbar. When you want to use it, just click the bookmarklet and a new window will open. (It works in some of the most popular web browsers like Firefox, Chrome, IE, Safari, Opera)
* For Firefox users: If you want TwitterGadget to appear in the sidebar when you click the bookmarklet (instead of a new window “popping up”), right-click on the bookmarklet and click Properties. Check Load this bookmark on the sidebar. You’re done!